Androidアプリのインタフェース 〜ListView〜
データをリスト形式で表示するビュークラス。
項目を一覧表示できるので、Androidアプリでは使用頻度が高い、と思います。
主なコーディングとしては、
- レイアウトファイル(XML)に"ListView"を追加(main.xml)
- "ListView"に表示する内容のレイアウトファイルを作成(上記と別のレイアウトファイル(list.xml))
- "ListView"にデータを渡す"ArrayAdapter"クラスのインスタンスを作成し、"setAdapter"で"ListView"を設定(TestApp.java)
という感じになります。
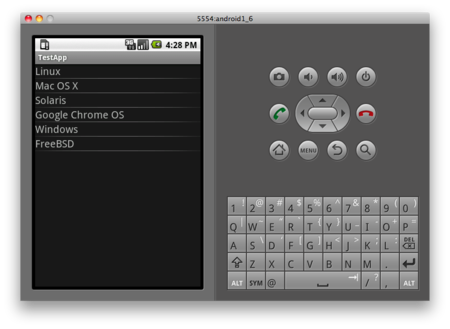
サンプルとして、OS名が格納された配列をリスト表示するアプリを作成しました。
<!--- main.xml --->
<?xml version="1.0" encoding="utf-8"?>
<LinearLayout xmlns:android="http://schemas.android.com/apk/res/android"
    android:orientation="vertical"
    android:layout_width="fill_parent"
    android:layout_height="fill_parent"
    android:textSize="20sp"
    >
    <ListView
        android:id="@+id/list"
        android:layout_width="fill_parent"
        android:layout_height="fill_parent"
        />
</LinearLayout>
<!--- list.xml --->
<?xml version="1.0" encoding="utf-8"?>
<TextView
    xmlns:android="http://schemas.android.com/apk/res/android"
    android:layout_width="fill_parent"
    android:layout_height="fill_parent"
    android:textSize="20sp"
    />
main.xmlの"ListView"に、list.xmlの表示を組み込む形になります。
表示する文字のサイズなどは、list.xmlで設定します。
package com.example.TestApp;

import android.app.Activity;
import android.os.Bundle;
import android.widget.*;

public class TestApp extends Activity {

    private ListView list;

    public void onCreate(Bundle savedInstanceState) {
        super.onCreate(savedInstanceState);
        setContentView(R.layout.main);

        // 表示用データ
        String[] arr = {"Linux","Mac OS X","Solaris","Google Chrome OS","Windows","FreeBSD"};

        // ArrayAdapterインスタンス作成、ListViewへの表示
        list = (ListView)this.findViewById(R.id.list);
        ArrayAdapter<String> adapter = new ArrayAdapter<String>(this, R.layout.list, arr);
        list.setAdapter(adapter);
    }

}
実行すると、以下のような感じになります。

リストに表示された各項目は、"OnItemClickListener"*1でクリック時にイベント処理が可能です。
イベント処理については、また別の機会に。